How To Design Your Own Solar Panel?
With energy costs on the rise, more people are looking to solar power as an affordable and sustainable way to meet their electricity needs. Solar panels absorb sunlight and convert it into usable electricity through a process called the photovoltaic effect. DIY solar panel kits allow homeowners to build their own solar panel systems, often at a fraction of the cost of purchasing pre-made panels.
Constructing your own solar panels has many benefits beyond cost savings. You can fully customize the system to your specific requirements, choose higher quality materials, and gain the satisfaction of generating your own renewable power. However, proper planning and safe installation practices are critical to success.
This article provides a step-by-step guide to designing and assembling your own solar panel from individual components. We will cover important safety information, system sizing and design considerations, sourcing quality parts, constructing the panel, and how to integrate it with your home’s electrical system for seamless renewable energy generation.
Safety Precautions
Designing and building your own solar panel system requires working with electricity and power tools. It’s important to take safety precautions to avoid injury.
Make sure to wear proper personal protective equipment when working on your solar panel project. This includes safety goggles, work gloves, and closed-toe shoes. Avoid wearing loose clothing or jewelry that could get caught in equipment.
Only work on your solar panel system when you are alert and focused. Do not work when tired or distracted. Operating power tools requires your full attention.
Never work on your solar panel system alone. Have someone present who can assist you in case of an emergency or injury. They can also act as a spotter when lifting heavy objects.
Keep your work area clean and organized. Do not allow clutter or debris to accumulate, as this can cause slips and falls.
Use extreme caution when working with electrical components. Make sure power is disconnected before making any connections. Double check wiring before restoring power.
Treat all parts of the solar panel system as if they are live. Even small amounts of electricity can injure or kill you.
Have an ABC fire extinguisher on hand. Know where circuit breakers are located so power can be quickly disconnected.
Take your time and don’t rush. Attempting to work too quickly often leads to mistakes and injuries.
Following proper safety precautions will help ensure you can complete your solar panel project injury-free.
Planning Your System
Planning is a key first step when designing your own solar panel system. There are several factors to consider:
Determine Electricity Needs
Calculate your average daily electricity usage to understand how much energy your solar panel system will need to produce. Review utility bills to see your average monthly kilowatt hour usage. Identify which appliances and devices use the most electricity. Consider any future electric needs as well. This will help size your solar panel system appropriately.
Site Selection
Choose a location for your solar panels that receives abundant direct sunlight, preferably 6-8 hours per day year-round. Avoid shaded areas. South-facing rooftops or open grounds are ideal, but east/west-facing options can work too. Consider hassles like permits, HOA rules, trees/buildings causing shade.
Angle and Orientation
Angle solar panels to face as close to true south as your location allows. Panels should be tilted at an angle equal to your latitude for optimal year-round production. However, angles facing west to southwest are acceptable. Use a compass and angle finder tools to properly position your panels.
Sourcing Components
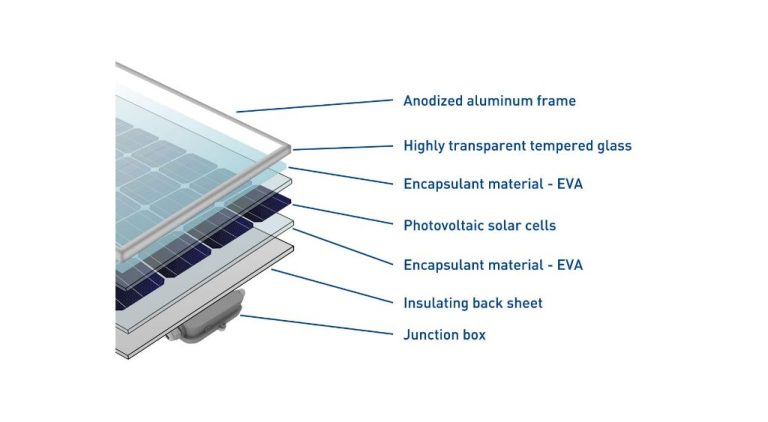
The most important component of a solar panel is the photovoltaic cell. These cells convert sunlight into electricity. There are a few different types of photovoltaic cells to choose from, but monocrystalline and polycrystalline silicon cells are the most common for DIY solar panels.
You’ll need a backing material like glass or plastic to mount the solar cells to. Aluminum frames are also commonly used to provide support. Make sure to get weatherproof backing and framing materials.
For wiring, you’ll need solar cell tabbing wire to string the cells together electrically. Use a junction box to connect the wiring from the panel to your load. Copper wiring and MC4 connectors are good options.
When sourcing components, make sure to get all the protective equipment and installation materials you may need as well. Things like soldering irons, sealants, brackets, and conduit can make the installation much easier.
Design Considerations
When designing your solar panel, you’ll need to make some key decisions about the layout and electrical configuration. Here are some of the main design considerations:
Cell Layout
You’ll need to determine how many solar cells to use and how to arrange them within the panel. Typical options include:
- Series cell strings – Wiring cells in series boosts voltage
- Parallel cell strings – Wiring cells in parallel increases current
- Total number of cells – More cells generate more power
- Cell matrix – Typical arrangements are 4×9, 5×10 etc.
Series vs. Parallel
You can wire solar cells in series and/or parallel. Series connections boost voltage, while parallel connections increase current. Many DIY panels use a combination. For example, you may have 3 sets of 10 solar cells wired in series to get the desired voltage, with those 3 cell strings then wired in parallel.
Output Voltage
Consider the output voltage needed to properly charge your battery bank or tie into other equipment. Most DIY solar panels output 12V, 24V or 48V nominal. Make sure your solar cell matrix and wiring matches your desired system voltage.
Wire Sizing
Select wiring sized appropriately for the output current of your solar panel design. Thicker wires are better to minimize resistive losses. Typical wire gauges used are 10 AWG to 16 AWG.
Assembly
After you have all the necessary components, it’s time to assemble your solar panel. This process requires care and attention to detail to ensure proper connections and a durable, functional finished product.
Start by clearing a large, clean work area with good lighting. Lay out all your supplies so they are easily accessible. Make sure to ground yourself to prevent static discharge which could damage the delicate solar cells.
Carefully solder interconnect ribbons between each solar cell, joining them together in series. Apply even heat so as not to crack the cells. Check connections are secure.
Once all cells are soldered, attach a diode to the end of the cell string to prevent reverse current flow. Solder interconnects from cell string to bus wire connections.
Clean surfaces thoroughly then apply thermal adhesive to the back of the cells. Position onto your backing material (plywood, metal etc) and press firmly to bond. Ensure all cells are aligned and spaced evenly.
Solder remaining bus wire connections. Affix blocking diodes between strings if designing multiple arrays. Test voltages to verify string polarity and isolation.
Inspect all joints, connections and placements thoroughly before proceeding. Any mistakes could compromise panel function or safety.
Enclosure
The solar panel enclosure is key for protecting the internal components from weather damage. Choose a durable, outdoor-rated housing made of a robust material like anodized aluminum that can withstand sun, rain, snow, and temperature swings.
Look for an enclosure with an IP65 or higher ingress protection rating, which indicates a dust-tight and water-resistant design. The housing should have a transparent tempered glass or polycarbonate front cover that allows sunlight to reach the solar cells while keeping out moisture.
Make sure the enclosure has openings or knockouts that allow you to run wiring from the solar cells/other internal components to outside connections. You’ll need to be able to integrate a weatherproof junction box where those wires can connect securely.
Opt for an enclosure size that provides some room around the perimeter of the solar panel or cells. This allows air circulation to prevent overheating. But avoid an overly large housing that adds unnecessary weight.
Some key factors when selecting the solar panel enclosure include durability, weather sealing, electrical integration capabilities, ventilation, and optimal sizing.
Mounting
When designing your solar panel system, you’ll need to determine the best mounting method for your situation. There are three main options for mounting solar panels:
Rooftop Mount
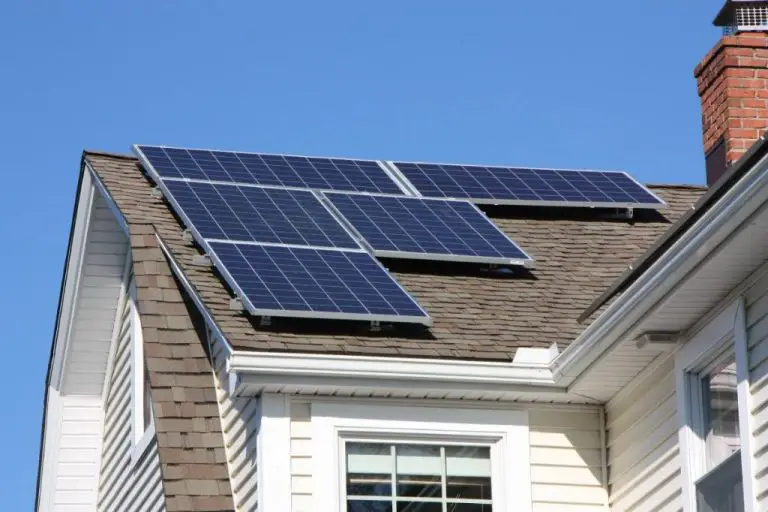
Mounting solar panels on your roof is a popular option for homeowners. Rooftop mounts can be installed parallel to the roof or tilted at an angle. Make sure your roof can structurally support the additional weight of the solar array. Rooftop mounts may require reinforcing the roof structure or installing rails prior to panel installation.
Ground Mount
Ground mount systems involve installing mounts secured in the ground to hold the solar panels in place. This allows you to orient the panels at the optimal tilt angle. Ground mounts work well for larger arrays and can be installed in backyards or open spaces on your property. Just make sure there are no obstructions that will shade the panels.
Pole Mount
Pole mounting involves securing solar panels to a pole fixed into the ground or on a concrete foundation. This elevates the array above the ground and can help avoid shading. Pole mounts are commonly used for small to mid-size solar installations and work well in locations without suitable roof or ground space.
Consider the pros and cons of each mounting method for your specific home and property when designing your solar panel system.
Connecting to Electrical
Once your solar panel is assembled and ready to be connected, you’ll need to decide if you want an off-grid or grid-tied system. An off-grid system means the solar panel will charge a battery bank that will provide electricity just for your home or facility. A grid-tied system connects to the electric grid so any excess electricity generated can be sent back to the grid.
For off-grid systems, you’ll need a charge controller that regulates the voltage and current coming from the solar panels to safely charge your batteries. The charge controller ensures the batteries aren’t overcharged. Connect the leads from your solar panel to the solar input terminals on the charge controller. Then connect leads from the charge controller’s output terminals to your battery bank.
You’ll also want to install a disconnect switch between the solar panels and charge controller. This allows you to safely disconnect the solar panels for maintenance. Choose an appropriately rated switch for the amount of voltage and current your system will produce.
For grid-tied systems, you’ll need a grid-tied inverter that converts the DC electricity from the solar panels into AC electricity that is compatible with the grid. Connect the leads from the solar panels to the DC input side of the inverter, then connect leads from the AC output side of the inverter to your home’s electric panel.
Consult an experienced solar installer if you need help determining the appropriate components and wiring setup. Follow all national and local electrical codes for safely connecting a DIY solar panel system.
Maintenance
Solar panels generally require little maintenance, but some periodic care can help keep your system performing efficiently for years. Here are some maintenance tips for DIY solar panels:
Periodic cleaning – Dust, dirt, and bird droppings can accumulate on the glass surface of solar panels, blocking sunlight. Clean the glass every few months with a soft brush and mild soap and water. Avoid abrasive cleaners or scrubbing that could scratch the glass.
Wire inspection – Check any exposed wires for damage like cracks or fraying. Replace damaged wires right away to prevent shorts or other electrical issues.
Replacing damaged cells – If you notice any solar cells are damaged or not functioning, you may be able to replace just those cells. Carefully remove the bad cell(s) and solder in new ones matching your original specs.
Check connections – Inspect all electrical connections for corrosion and tighten if needed. Bad connections can reduce power output.
Check mountings – Make sure panel mountings are still secure with no loose parts. Tighten or reinforce as necessary.
With occasional cleaning and inspections, DIY solar panels can deliver free, renewable power for many years.

