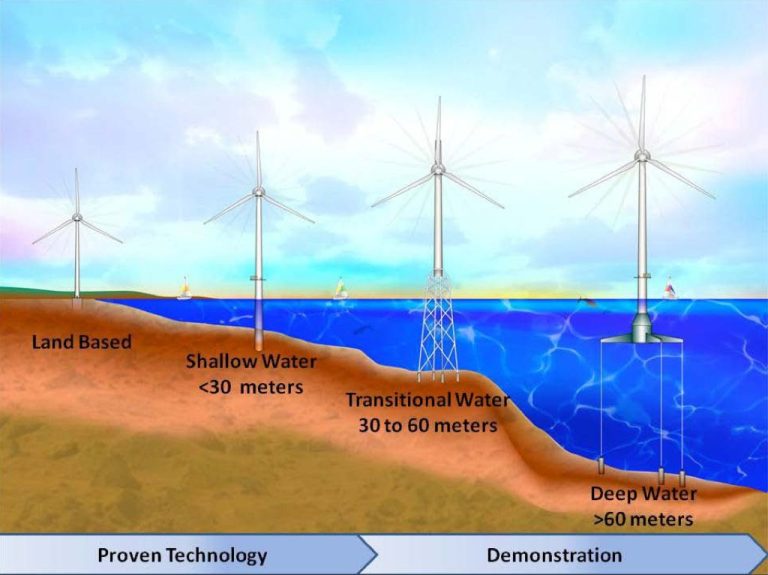
How Do You Make A Hydroelectric Science Project?
Hydroelectric power, or hydropower, is a form of renewable energy that uses flowing water to generate electricity. It works by converting the kinetic energy from moving water into electrical energy. Here’s how it works:
- Moving water from a river or reservoir flows through an intake and pushes against turbine blades inside a generator.
- The moving water causes the turbine to spin, which then spins a shaft connected to a generator to produce electricity.
- The electricity is then transmitted through power lines to homes, businesses, and industries.
The key scientific principles behind hydroelectricity are potential energy, kinetic energy, and gravity. The water behind a dam has potential energy due to its elevation. When the water flows down through the dam, this potential energy gets converted into kinetic energy as it pushes the turbine blades. The blades then spin and convert the kinetic energy into electricity using electromagnetic induction. Gravity causes the continual downward motion of the water to perpetuate the process.
Materials Needed
To build a hydroelectric power project, you will need the following materials:
- Turbine – This can be a small fan or propeller that will spin when water hits it. Ensure it is waterproof or made for underwater use. A small PC cooling fan can work well.
- Generator – A small DC motor can act as a generator to convert the rotational energy from the turbine into electrical energy. Make sure to get one that operates at low voltages and speeds.
- Wires – You’ll need connecting wires to go from the generator to your output/load device. Solid core wire works best.
- Cardboard, wood, or other materials to build a dam structure – This will hold back the water to create a “reservoir” and direct it over your turbine. Make sure it’s waterproofed.
- Plastic tubing, funnels, or gutters – These can help direct the water flow onto the turbine.
- Containers to hold water – Buckets, plastic bins, or a small pool can act as your water reservoir.
- Output device – A small light bulb, LED, or motor that your generator can power.
Be creative in finding or repurposing materials to build your hydroelectric project. The key components are a turbine connected to a generator with wiring to your output device. The dam and water directing components help focus the water flow onto the turbine.
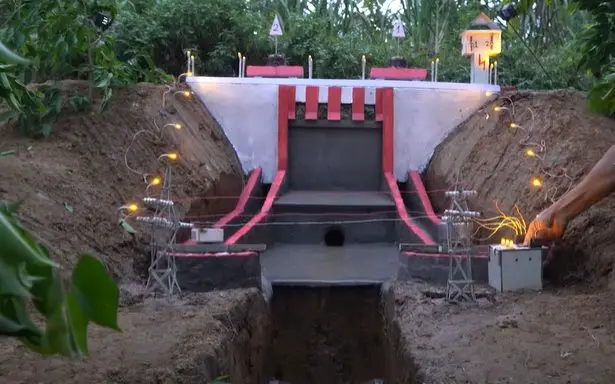
Building the Dam
The dam is one of the most important components of the hydroelectric project, as it is responsible for regulating the flow of water to turn the turbine. Here are step-by-step instructions for building the physical dam structure:
You will need cardboard, wooden boards, plastic sheets, silicone or modeling clay, and hot glue. Cut the cardboard, wood, and plastic to the desired height and width measurements. Arrange them in a way that forms the basic shape of the dam. Use silicone or modeling clay to seal any gaps or leaks between the materials. This will prevent water from flowing through before reaching the turbine.
Next, use hot glue to firmly attach all the pieces of material together. Make sure the dam is braced properly and reinforced if necessary so it can withstand pressure when water builds up behind it. The dam should be watertight and sturdy.
Attach the turbine housing to the dam wall where you want the water to flow out. Make sure it is secured and sealed to prevent leaking. The turbine will spin from the force of water flowing through this outlet.
Once constructed, test the dam by pouring water into the reservoir side and checking for leaks. Ensure it holds up and regulates water flow as expected. Make any necessary repairs or adjustments before moving on to adding the turbine and generator.
Installing the Turbine
The turbine is a key component of the hydroelectric project, as it converts the kinetic energy of the flowing water into rotational energy. Proper installation and positioning of the turbine is important for maximizing power generation.
According to the Micro Hydro Turbine Installation Process from Micro-Hydro-Power.com, the turbine should be attached securely to the dam or water channel using bolts or clamps. It’s recommended to attach the turbine at a point where the water velocity is the highest. This allows the turbine blades to rotate at an optimal speed.
The turbine blades should be completely submerged in the stream of water. Make sure no bubbles or cavities form behind the blades, as this can reduce efficiency. The turbine shaft should be positioned horizontally to connect properly with the generator. Some adjustment of the turbine height and angle may be needed to achieve the right alignment and immersion.
Once aligned, the turbine connection point can be sealed with waterproof material like silicone. This prevents leakage and damage. Always double check that the turbine spins freely before completing the hydroelectric system setup.
Connecting the Generator
One of the key steps in building a hydroelectric generator is connecting the generator to the turbine. According to the U.S. Geological Survey, “A turbine connected to a generator produces power inside a dam.” 1 The turbine converts the mechanical energy of the moving water into rotational energy. This rotational energy is then transferred to the generator via a shaft connection.
To connect the generator, you first need to select the right type of generator. For small home science projects, a simple DC motor can act as the generator. Larger generators designed specifically for hydroelectric systems are also available. Once you have your generator, it needs to be securely mounted near the turbine. A direct shaft coupling between the turbine and generator is optimal for maximum energy transfer.
Make sure the shaft coupling is tight and aligned properly. Misalignment can cause vibration, loss of energy transfer, and equipment damage. You may need to fabricate custom mounting and coupling hardware to connect your particular turbine and generator. Proper alignment and mounting is crucial for smooth operation.
Once connected mechanically, the generator will start producing electricity as the turbine spins. Now you just need to safely wire the generator output to your desired application, such as a battery bank or inverter connected to the grid. With the mechanical and electrical connections complete, you will have successfully converted the kinetic energy of water into usable electricity.
Wiring
Wiring the hydroelectric generator to a light bulb circuit is a key step in completing the science project. You’ll need some basic circuit components like wire, a light bulb, and light bulb holder. Refer to the “Build Your Own Hydroelectric Generator” resource from HowToSmile.org for a complete list of required materials and visual wiring diagrams.
First, connect two wires to the positive and negative posts on the generator. Make sure to securely fasten the stripped ends of the wires under the screws on the posts. Run the wires to your light bulb holder and connect one wire to each screw terminal. Then screw an incandescent light bulb into the holder.
When everything is connected properly, the flowing water will spin the turbine, powering the generator to produce electricity. This electricity will light up the bulb in your circuit! Refer to the wiring diagram in the HowToSmile guide if you need help with the connections.
The generator can also be connected to other simple circuits like a motor or buzzer. Just make sure not to draw more power than the generator can produce. For just lighting up a bulb, the setup should run smoothly.
Testing the Project
Once your hydroelectric model is fully constructed, it’s time to test it out. Here are some tips for testing your setup and troubleshooting any issues that arise:
Start by running water through your system without the turbine hooked up. Check for leaks and make sure water flows smoothly through the dam and pipes. Adjust or reinforce any parts that leak.
Next, connect your turbine and generator. Slowly increase the water flow and observe the turbine spinning. You may need to make adjustments to get it running smoothly. The turbine should spin easily – if not, check for obstructions or friction.
Finally, test the generator. Use a multimeter to check that it’s producing electricity as the turbine spins. You should see the voltage increase as water flow and turbine speed increase. If not, there may be a wiring issue. Double check all connections.
If your system doesn’t work at first, don’t get discouraged! Debugging is an important part of engineering. Check for leaks, blockages, loose wires, and fraying. Make adjustments and retry. Consider starting over if needed. With patience, you’ll get your hydroelectric model to work.
For additional troubleshooting tips, see Model Testing of Francis-Type Hydraulic Turbines or IEC 60193:1999 standard for model testing of turbines.
Experiments to Try
There are many ways to modify and experiment with this hydroelectric science project. Here are some ideas:
- Test how the height of the water reservoir affects power output. Does raising the reservoir result in more electricity generated? Try reservoirs at different heights and measure the output.
- Experiment with different turbine designs. How does turbine size, number of blades, or blade shape affect electricity production? Design and test different turbines.
- Vary the load on the generator by connecting different resistors or devices. How does the load affect the amount of electricity that can be produced? Find the optimal load for maximum power.
- Explore using different generators. How does generator size or design impact the electricity generated?
- Modify the water flow to the turbine using valves or variable pumps. How does water flow rate impact power output?
For more ideas see the Science Buddies resource on Using Hydropower to Lift a Load.
Presenting the Project
Here are some tips for effectively presenting your hydroelectric science project at a science fair:
– Create an attractive and informative backdrop that explains your project and highlights key facts. Use large text and visuals so people can easily understand the concept from a distance. For example, include a diagram showing how a hydroelectric dam works.
– Prepare a 1-2 minute “elevator pitch” to explain your project when visitors walk up. Focus on key points like your objective, methodology, results, and conclusions. Speak slowly and clearly.
– Make models and prototypes the centerpiece of your display. Let people see your homemade turbine and generator up close. Demonstrate how the components work together to convert water power into electricity.
– Have neatly written summaries or posters that provide more detail about the purpose, hypothesis, materials, procedure, data, and analysis. People can read further if interested.
– Be ready to answer questions about how you built components, calculated data, overcame problems, and got interested in hydroelectricity. Share pictures or videos of construction.
– Have fun with it! Show enthusiasm for your work and highlight the most interesting or surprising discoveries from your experiments. Your excitement will draw people in.
Related Concepts
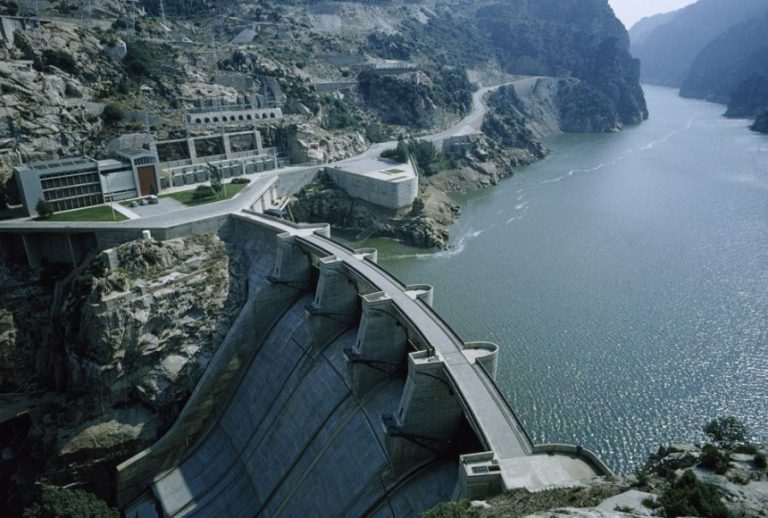
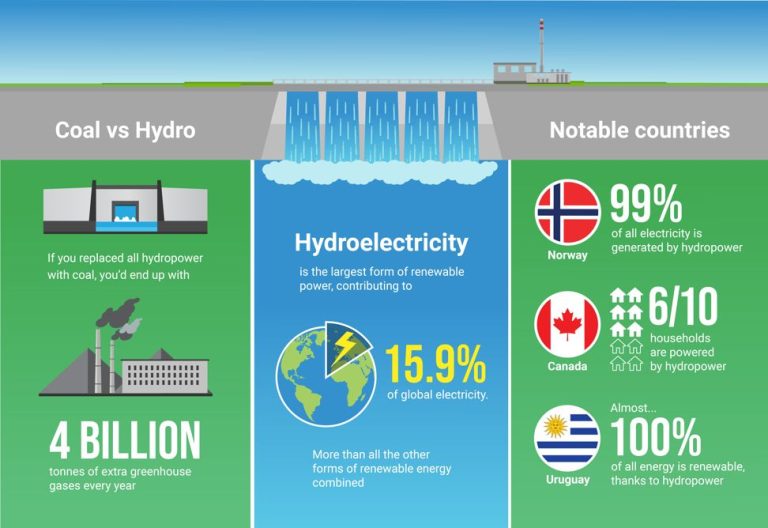
Hydropower has been used for thousands of years, dating back to ancient Greece and China where water wheels were used to grind grain. In the late 19th century, hydropower played a major role in the electrification of many countries like the United States.[1] Today, hydropower is one of the most important renewable energy sources globally, providing 71% of all renewable electricity production.[2]
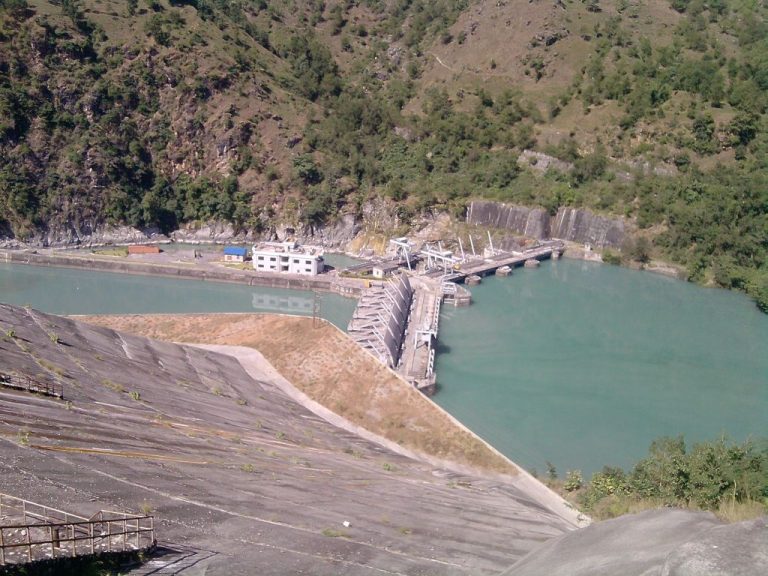
Large-scale hydropower projects, like the Hoover Dam in the United States, provide clean electricity to millions of households. But micro hydropower projects also offer a local renewable energy solution by harnessing energy from streams, canals, and rivers with a small dam and turbine. This makes hydropower highly versatile for large and small-scale applications.
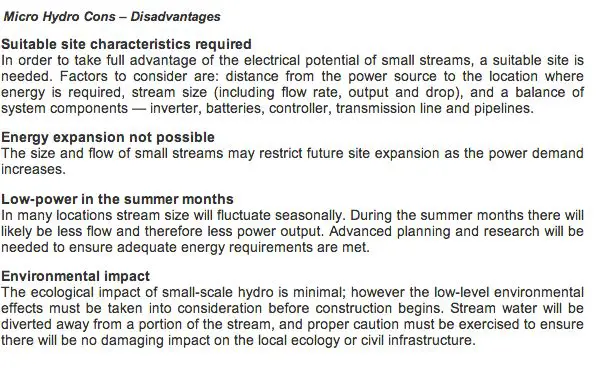
However, hydropower projects can also impact the local environment. Large dams flood habitats and obstruct fish migration routes. But solutions exist, like fish ladders and wildlife conservation measures. Overall, hydropower’s advantages as a stable renewable electricity source that balances grids often outweigh its downsides.
Building a small hydropower project teaches about concepts from physics, engineering, and renewable energy. It’s an engaging way to learn about how kinetic energy from flowing water can be converted into electricity. With creativity, micro hydropower projects could even provide off-grid electricity solutions in rural areas.
[1] https://www.energy.gov/articles/top-10-things-you-didnt-know-about-hydropower
[2] https://www.hydropower.org/iha/discover-facts-about-hydropower